Deprecated: Use of "parent" in callables is deprecated in /home/292293.cloudwaysapps.com/ejxumdpjev/public_html/wp-content/plugins/divi-module-code-snippet/divi-shim/class_DBCS_Builder_Module_3_1.php on line 165
Deprecated: Use of "parent" in callables is deprecated in /home/292293.cloudwaysapps.com/ejxumdpjev/public_html/wp-content/plugins/divi-module-code-snippet/divi-shim/class_DBCS_Builder_Module_3_1.php on line 158
Add Some Fun Design Style To Divi Headlines
In today’s tutorial, I want to share a fun way to add some unique design style to your Divi heading text. I’m going to show you how to add decorative lines beside your heading text. This can be on the right side of a headline, or on both. You can adjust the color and thickness of the lines however you want. These snippets work make the line width beside the text “auto-adjustable” which is pretty cool. I recommend watching the video on this one to get the full benefit of this fun Divi tutorial!
▶️ Please watch the video above to get all the exciting details! 👆
Add A Decorative Line On Both Sides of A Divi Heading
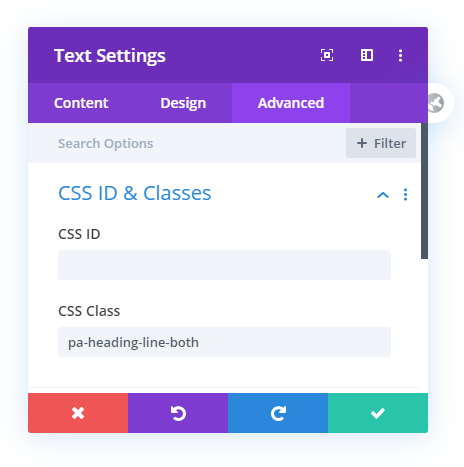
First, add the CSS class “pa-heading-line-both” to any module where you want the lines to appear on the heading.

Where To Paste The CSS Code
1. Divi Assistant
If you are using our Divi Assistant plugin, simply paste the code in the CSS tab in the custom code window in the Divi Visual Builder.
2. Child Theme
If you are using a child theme, paste this code into the style.css file. If you don't have a child theme, you can generate a child theme directly on your site or download our free child theme.
3. Divi Theme Options Integration
Otherwise, paste this code in your Divi>Theme Options>Custom CSS code box.
If you need help understanding where to paste the code, please check out our complete guide about where to add custom code In Divi.
/*center the heading and lines*/

.pa-heading-line-both h2 {
	display: flex;
	width: 100%;
	justify-content: center;
	align-items: center;
	text-align: center;
}


/*add and adjust the lines*/

.pa-heading-line-both h2:before,
.pa-heading-line-both h2:after {
	content: '';
	border-top: 2px solid;
	margin: 0 20px 0 0;
	flex: 1 0 20px;
	color: #666666;
}


/*add spacing between heading and lines*/

.pa-heading-line-both h2:after {
	margin: 0 0 0 20px;
}
Notice that we are targeting an H2 heading, which is what we used in the video example. You can change this to H1, H3, etc.
Add A Decorative Line On The Right Side of A Divi Heading
If your text is left aligned, you may want to add a line to the right side of your Divi heading text. I like to do this one, and it works really well. The line will extend to the right as far as the column width. As always, feel free to change the thickness and color of the line, or change the h2 to h1, etc.
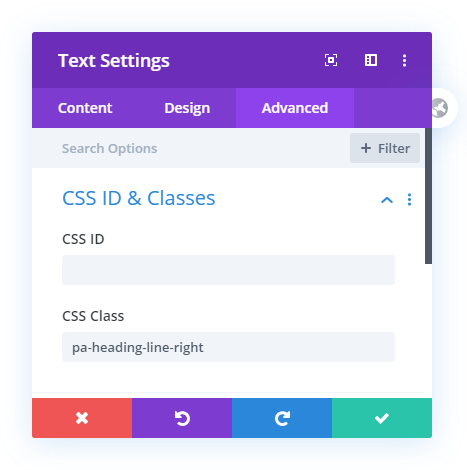
First, add the CSS class “pa-heading-line-right” to any module where you want the lines to appear on the heading.

Where To Paste The CSS Code
1. Divi Assistant
If you are using our Divi Assistant plugin, simply paste the code in the CSS tab in the custom code window in the Divi Visual Builder.
2. Child Theme
If you are using a child theme, paste this code into the style.css file. If you don't have a child theme, you can generate a child theme directly on your site or download our free child theme.
3. Divi Theme Options Integration
Otherwise, paste this code in your Divi>Theme Options>Custom CSS code box.
If you need help understanding where to paste the code, please check out our complete guide about where to add custom code In Divi.
/*align the heading and lines*/

.pa-heading-line-right h2 {
	display: flex;
	width: 100%;
	justify-content: center;
	align-items: center;
	text-align: center;
}


/*add and adjust the lines*/

.pa-heading-line-right h2:after {
	content: '';
	border-top: 2px solid;
	margin: 0 20px 0 0;
	flex: 1 0 20px;
	color: #666666;
}


/*add spacing between heading and line*/

.pa-heading-line-right h2:after {
	margin: 0 0 0 20px;
}
How To Customize The CSS Heading Lines
There are several ways you can use and customize these snippets to better fit your website. For example, you can change the color, thickness, and width of the lines. We cover these scenarios much better on video, so be sure to watch the video embedded above.
Change the Line Color
You can can easily change the color of the line by replacing the hex color “#666666” with anything you want.
Change The Line Thickness
You can can easily change the thickness of the line by replacing the border-top “2px” value with something else, like “1px,” or maybe “20px.”
You could even make the thickness the same value as the font size!


Nice!! You can use a fontawesome icon too!
Thanks
Nifty!
Indeed 🙂
brilliant! nice little snippet there
Thanks, glad you like it!
Hey on my website it doesn’t work. When I add the code to the I have error expected rbrace. Can you help me?
Hi Kamil,
That error sounds like you are just adding it to the wrong location, like the module. Make sure to add it where it says in the tutorial and let me know how it goes!
Hi ! Thanks for the guide.
Is it possible to have a left side line ?
Edit : Ok we just need to replace after by before !
Sounds like you got it, great!
Thanks for this. Works great on Desktop. However, when I’ve checked on my iPad/iPhone the headings aren’t appearing at all?
I’m not sure Andy, sounds weird and unrelated. I can’t test it, don’t own anything Apple as they have so many problems with their browsers.
Sorry, you can ignore me! I’m using your Divi Responsive helper plugin and had the responsive tabs open set to default.
I hadn’t realised with this option you’d need to enter the text for each view (so the content was missing in Tablet and Mobile). All working well, thanks!
I have been trying to use this snippet code with built-in icons in DIVI Blurbs. Running into issues where the lines are not showing up as i cannot identify the Icon in the CSS code.
So then i tried using the Fontawesome icons and again i cannot seem to make it work. Can anyone direct me to what i should be looking at?
I am assuming that you want to place the horizontal lines to the blurb module title. We need to use different selectors for the blurb modules to achieve that. So to add the lines please go to the Divi > Theme Options > Custom CSS Panel and place the code given below:
/*center the heading and lines*/
.pa-heading-line-both .et_pb_module_header {
display: flex;
width: 100%;
justify-content: center;
align-items: center;
text-align: center;
}
/*add and adjust the lines*/
.pa-heading-line-both .et_pb_module_header:before,
.pa-heading-line-both .et_pb_module_header:after {
content: '';
border-top: 2px solid;
margin: 0 20px 0 0;
flex: 1 0 20px;
color: #666666;
}
/*add spacing between heading and lines*/
.pa-heading-line-both .et_pb_module_header:after {
margin: 0 0 0 20px;
}
This code will place two horizontal lines around the title of the Blurb Module. To use any other design you can copy the properties from the above guide and use it with the selectors that I gave.
Let us know if that helps. 🙂
Please update the article, for example on a single page, if I want to apply horizontal line to all h2 tags. Then, horizontal line width changes with respect to the width of the text. I have updated the code in order to keep the horizontal width the same whether the text is short or long.
/*align the heading and lines*/
.pa-heading-line-right h2 {
display: flex;
width: 100%;
justify-content: flex-start;
align-items: center;
text-align: center;
}
/*add and adjust the lines*/
.pa-heading-line-right h2:after {
content: ”;
border-top: 2px solid;
margin: 0 20px 0 0;
flex: 1 0 20px;
color: #666666;
max-width:30%
}
/*add spacing between heading and line*/
.pa-heading-line-right h2:after {
margin: 0 0 0 20px;
}
Hi Naveed,
Thank you for your feedback. I saw that the max-width of 30% did the trick there. We will surely look into this and rectify the issue. 🙂
Hi,
Thank you for this little snippet! It doesn’t work for where I want to add it though… any help would be appreciated 🙂
I’d like to add this to my all posts template only so that post content for H3’s will appear with lines (ideally a line on top of the H3)… but if I put it in the main element code box under the advanced tab for the post content module I get an “error expected rbrace”… and adding it to the styles file doesn’t do anything either. How do I target it? The main element box targets .et_pb_post_content_0.
Also, is it possible to have a short line in any colour above the H3 instead of at the side?
Cheers!
Hi there,
The Main Element box is for the snippet that is without the selectors or the snippet that contains only CSS properties and that’s why you are getting the error. Please go inside the theme builder template, then click on the settings icon at the bottom which will take you to page settings, and then go to Advanced tab > Custom CSS and place the snippet there.
This didn’t work at all for me. I just ended up with four lines, or with two lines on one side. Why?
You’re welcome to share the website link so we can see the code and advise.
Awesome, thanks so much!
You’re welcome, Cath!
This is a great tutorial on placing horizontal decorative lines. Thank you! My question is: How could I place a vertical decorative line to the left of a headline?
I appreciate you!
Hi Kami!
Please add the following code only for the left vertical line:
.pa-heading-line-both h2:before {
content: ”;
border-left: 2px solid;
margin: 0 20px 0 0;
flex: 1 0 20px;
color: #666666;
}
Let me know how it goes!
Hi —
I love your tutorials — very helpful!
I’m trying to add horizontal lines from a centered image and from a centered button (see website link images). The pattern from the image is similar to the one discussed above. There is a space between the lines and the image. Fo the button, the line lines are short and come directly out of it.
I’ve tried a few versions of your solution but cant get it to work.
Any ideas?
Thanks so much! (I’m buying a plugin as a thank you)
Hi Shaun!
There could be an outer container that could be taking up the space between the image and the line. Please share the URL of the page to investigate further.
I use this solution to make a divider.
I simply place an icon in the middle and make both lines a bit thicker. You can then adjust the colors depending on the theme of the website or blog.
———————— ☮ ————————