Deprecated: Use of "parent" in callables is deprecated in /home/292293.cloudwaysapps.com/ejxumdpjev/public_html/wp-content/plugins/divi-module-code-snippet/divi-shim/class_DBCS_Builder_Module_3_1.php on line 165
Deprecated: Use of "parent" in callables is deprecated in /home/292293.cloudwaysapps.com/ejxumdpjev/public_html/wp-content/plugins/divi-module-code-snippet/divi-shim/class_DBCS_Builder_Module_3_1.php on line 158
Add Modules Over The Image Module
Not A good Solution
When you first think of adding text or a button over an image, you may think this would be easy – just use the Call-To-Action module, right? Wrong! There are at least two problems with that method. One, the image would need to be a background image, which means it will get cropped. Secondly, background images are decorative and do not contribute to SEO. So unfortunately that option is out.
Our Past Okay Solution
If you are a long time follower or good Googler you may recall I created a tutorial in the past about this same topic. However, in that tutorial the approach was okay but not great. We used a pseudo class to add text over the image and then style it to look like a button. It worked, but had problems any time the text got too long and it was just an awkward way to do it.
A Great New Solution
So here we are again and this time we will deliver the best solution possible using actual Divi Button modules that you can style in the builder and actual Text modules and even get this – the Call-To-Action module (for text AND a button). So let’s get started with this tutorial and show you how to add text or a button or both centered over a Divi Image module!
▶️ Please watch the video above to get all the exciting details! 👆
The Process
We have three different things we are showing you today.
- Text over an image
- Button over an image
- Text AND a button over an image
Each of these have the same steps, so just choose whether you want a button, text, or both and proceed with that one. The steps are pretty simple. Add the modules to your layout, add a custom CSS class to that column, adjust the design settings, and add the CSS snippet.
Where To Paste The CSS Code
1. Divi Assistant
If you are using our Divi Assistant plugin, simply paste the code in the CSS tab in the custom code window in the Divi Visual Builder.
2. Child Theme
If you are using a child theme, paste this code into the style.css file. If you don't have a child theme, you can generate a child theme directly on your site or download our free child theme.
3. Divi Theme Options Integration
Otherwise, paste this code in your Divi>Theme Options>Custom CSS code box.
If you need help understanding where to paste the code, please check out our complete guide about where to add custom code In Divi.
Add A Divi Button Module Centered Over An Image Module
1. Add An Image Module And A Button Module In The Same Column
Go ahead and add an Image module to a column. Then below it also add a Button module. Here is what you should have so far:

2. Design The Modules
Of course you should take some time to adjust the Divi Builder design settings for both modules. Remember, this is the great thing about this method. You can use all the normal design settings for both modules!
3. Add A CSS Class To The Column
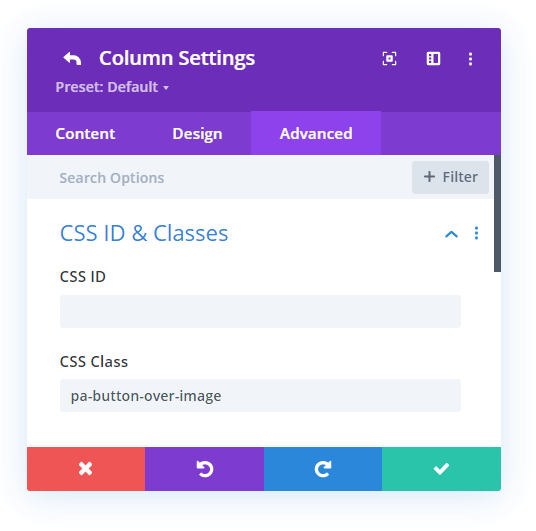
Now go to the Row Settings>Column Settings>Advanced tab>CSS ID & Classes toggle and add “pa-button-over-image” to the CSS Class input field. This class is used in the CSS snippet below to target this particular column. So you can add this custom class to any column that you want to have a button over an image.
4. Add The CSS Snippet To Your Website
Now it’s time to add the CSS snippet that does all the work for us.
Where To Paste The CSS Code
1. Divi Assistant
If you are using our Divi Assistant plugin, simply paste the code in the CSS tab in the custom code window in the Divi Visual Builder.
2. Child Theme
If you are using a child theme, paste this code into the style.css file. If you don't have a child theme, you can generate a child theme directly on your site or download our free child theme.
3. Divi Theme Options Integration
Otherwise, paste this code in your Divi>Theme Options>Custom CSS code box.
If you need help understanding where to paste the code, please check out our complete guide about where to add custom code In Divi.
/*move and position the Button module over the center of the Image module*/

.pa-button-over-image > .et_pb_button_module_wrapper {
	position: absolute;
	top: 45%;
	left: 50%;
	transform: translate(-50%, -45%);
	z-index: 10;
	transition: opacity 0.3s ease-in-out;
	/*opacity: 0; remove comment for hover reveal effect*/
}


/*add an optional overlay over the image*/

.pa-button-over-image > .et_pb_image .et_pb_image_wrap:before {
	content: "";
	position: absolute;
	width: 100%;
	height: 100%;
	background-color: #000000;
	z-index: 9;
	transition: opacity 0.3s ease-in-out;
	opacity: 0.3; /*make this 0 for hover reveal effect*/
}


/*show button on image hover*/

.pa-button-over-image:hover > .et_pb_button_module_wrapper {
	/*opacity: 1; remove comment for hover reveal effect*/
}


/*show overlay on image hover*/

.pa-button-over-image:hover > .et_pb_image .et_pb_image_wrap:before {
	/*opacity: 0.3; remove comment for hover reveal effect*/
}
5. Add Optional Hover Reveal Effect
In the snippet above I have added some extra code that will allow you to show the button when you hover over the image. You just need to make a few easy edits to make that happen. Everything is clearly noted in the code with instructions. If you need any help please watch the video to see what I mean.
6. View Results And Make Any Adjustments
Here is the result that I created in the video:

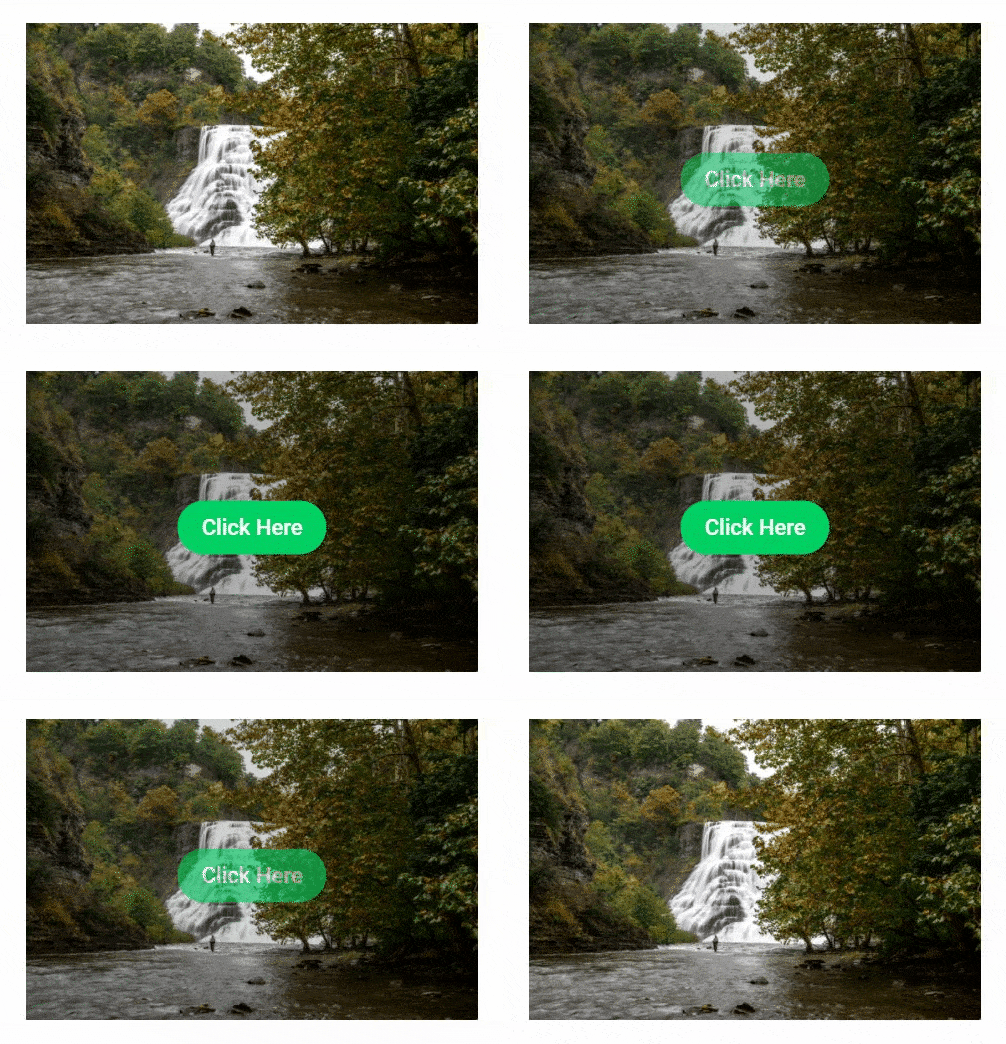
You may need to adjust the top: 44%; value. This will depend on some factors like how tall your button and image are and this is just a minor adjustment you may need to make on yours.
Add A Divi Text Module Centered Over An Image Module
1. Add An Image Module And A Text Module In The Same Column
Go ahead and add an Image module to a column. Then below it also add a Text module. Here is what you should have so far:

2. Design The Modules
Of course you should take some time to adjust the Divi Builder design settings for both modules. Remember, this is the great thing about this method. You can use all the normal design settings for both modules!
3. Add A CSS Class To The Column
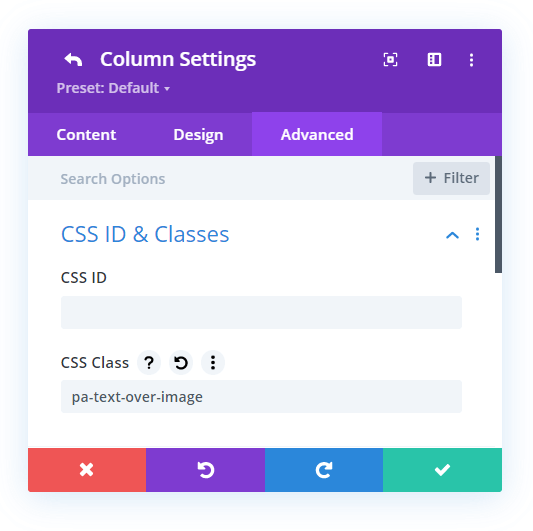
Now go to the Row Settings>Column Settings>Advanced tab>CSS ID & Classes toggle and add “pa-text-over-image” to the CSS Class input field. This class is used in the CSS snippet below to target this particular column. So you can add this custom class to any column that you want to have a text over an image.
4. Add The CSS Snippet To Your Website
Now it’s time to add the CSS snippet that does all the work for us.
Where To Paste The CSS Code
1. Divi Assistant
If you are using our Divi Assistant plugin, simply paste the code in the CSS tab in the custom code window in the Divi Visual Builder.
2. Child Theme
If you are using a child theme, paste this code into the style.css file. If you don't have a child theme, you can generate a child theme directly on your site or download our free child theme.
3. Divi Theme Options Integration
Otherwise, paste this code in your Divi>Theme Options>Custom CSS code box.
If you need help understanding where to paste the code, please check out our complete guide about where to add custom code In Divi.
/*move and position the Text module over the center of the Image module*/

.pa-text-over-image > .et_pb_text {
	position: absolute;
	top: 45%;
	left: 50%;
	transform: translate(-50%, -45%);
	z-index: 10;
	width: 100%;
	transition: opacity 0.3s ease-in-out;
	/*opacity: 0; remove comment for hover reveal effect*/
}


/*add an optional overlay over the image*/

.pa-text-over-image > .et_pb_image .et_pb_image_wrap:before {
	content: "";
	position: absolute;
	width: 100%;
	height: 100%;
	background-color: #000;
	z-index: 9;
	transition: opacity 0.3s ease-in-out;
	opacity: 0.3; /*make this 0 for hover reveal effect*/
}


/*show overlay on image hover*/

.pa-text-over-image:hover > .et_pb_text {
	/*opacity: 1; remove comment for hover reveal effect*/
}


/*show text on image hover*/

.pa-text-over-image:hover > .et_pb_image .et_pb_image_wrap:before {
	/*opacity: 0.5; remove comment for hover reveal effect*/
}
5. Add Optional Hover Reveal Effect
In the snippet above I have added some extra code that will allow you to show the button when you hover over the image. You just need to make a few easy edits to make that happen. Everything is clearly noted in the code with instructions. If you need any help please watch the video to see what I mean.
6. View Results And Make Any Adjustments
Here is the result that I created in the video. I center aligned the text, set the text color to white, and added some left and right padding.
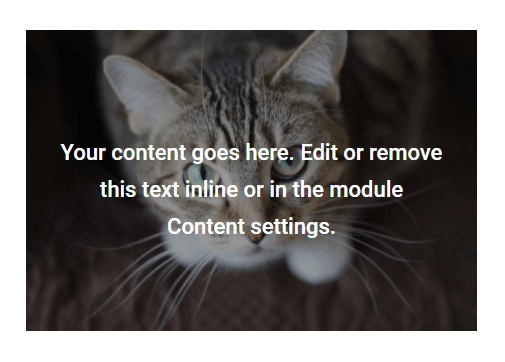

You may need to adjust the top: 44%; value. This will depend on some factors like how tall your button and image are and this is just a minor adjustment you may need to make on yours.
Add A Divi Call-To-Action Module Centered Over An Image Module
1. Add An Image Module And A Call-To-Action Module In The Same Column
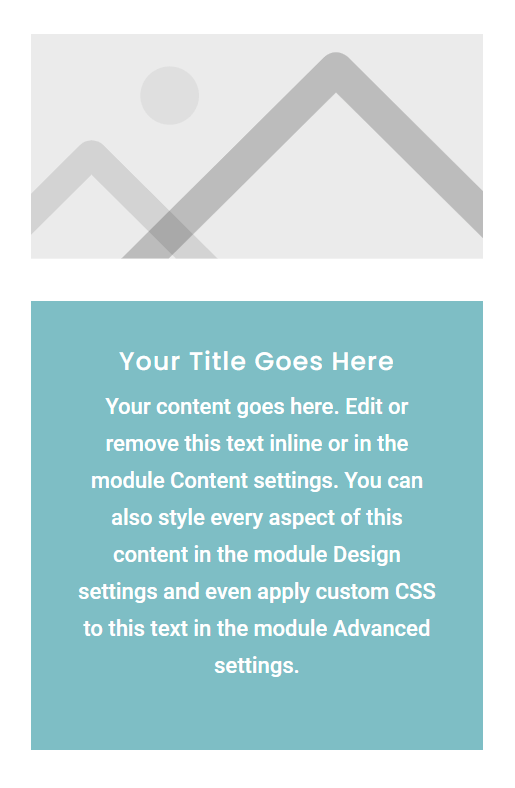
Go ahead and add an Image module to a column. Then below it also add a Call-To-Action module. Here is what you should have so far:
2. Design The Modules
Of course you should take some time to adjust the Divi Builder design settings for both modules. Remember, this is the great thing about this method. You can use all the normal design settings for both modules!
3. Add A CSS Class To The Column
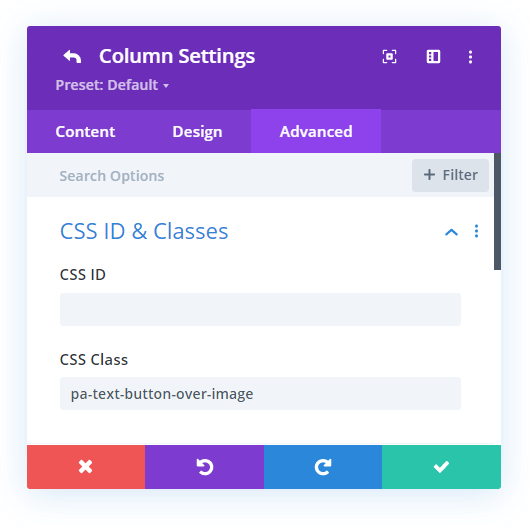
Now go to the Row Settings>Column Settings>Advanced tab>CSS ID & Classes toggle and add “pa-text-button-over-image” to the CSS Class input field. This class is used in the CSS snippet below to target this particular column. So you can add this custom class to any column that you want to have text and a button over an image.
4. Add The CSS Snippet To Your Website
Now it’s time to add the CSS snippet that does all the work for us.
Where To Paste The CSS Code
1. Divi Assistant
If you are using our Divi Assistant plugin, simply paste the code in the CSS tab in the custom code window in the Divi Visual Builder.
2. Child Theme
If you are using a child theme, paste this code into the style.css file. If you don't have a child theme, you can generate a child theme directly on your site or download our free child theme.
3. Divi Theme Options Integration
Otherwise, paste this code in your Divi>Theme Options>Custom CSS code box.
If you need help understanding where to paste the code, please check out our complete guide about where to add custom code In Divi.
/*move and position the Call-To-Action module over the center of the Image module*/

.pa-text-button-over-image > .et_pb_promo {
	position: absolute;
	top: 44%;
	left: 50%;
	transform: translate(-50%, -50%);
	z-index: 10;
	width: 100%;
	transition: opacity 0.3s ease-in-out;
	/*opacity: 0; remove comment for hover reveal effect*/
}


/*add an optional overlay over the image*/

.pa-text-button-over-image > .et_pb_image .et_pb_image_wrap:before {
	content: "";
	position: absolute;
	width: 100%;
	height: 100%;
	background-color: #000;
	z-index: 9;
	transition: opacity 0.3s ease-in-out;
	opacity: 0.5; /*make this 0 for hover reveal effect*/
}


/*show overlay on image hover*/

.pa-text-button-over-image:hover > .et_pb_promo {
	/*opacity: 1; remove comment for hover reveal effect*/
}


/*show call-to-action on image hover*/

.pa-text-button-over-image:hover > .et_pb_image .et_pb_image_wrap:before {
	/*opacity: 0.5; remove comment for hover reveal effect*/
}
5. Add Optional Hover Reveal Effect
In the snippet above I have added some extra code that will allow you to show the button when you hover over the image. You just need to make a few easy edits to make that happen. Everything is clearly noted in the code with instructions. If you need any help please watch the video to see what I mean.
6. View Results And Make Any Adjustments
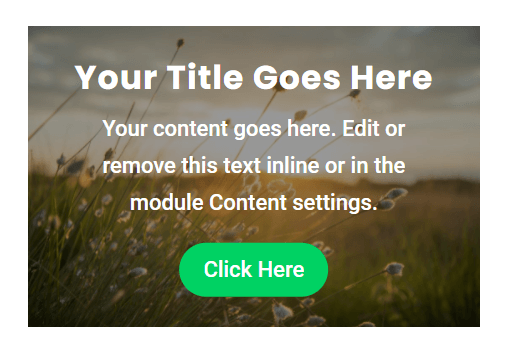
Here is the result that I created in the video. I center aligned the text, set the text color to white, removed the ugly blue background, added some left and right padding, and styled the button. Note that you will need to add a link to the button for it to show up!

You may need to adjust the top: 44%; value. This will depend on some factors like how tall your button and image are and this is just a minor adjustment you may need to make on yours.






Hi there, How do you make it work if there are 2 images in a column and you want different text overtop each image?
Hi Dayna,
The recommendation here would be to use two different rows one over the other and place the image text pair in two different columns for the perfect results. 🙂
Loved this tutorial! I tried to use it to add A Divi Text Module Centered Over An Image Module.
However when using the CCS snippet provided, I keep getting the messages ‘expected RBRACE’ at around line 3, and ‘unexpected token’ all the way at the bottom.
I’m not sure what the issue is and/or whether I should manually adjust any opening and closing braces in the snippet text provided?
Yes you guessed: newby…
Hi Lis,
I am afraid that I am not able to replicate the issue on my end. Please make sure to copy the code accurately and place it in Theme Options > Custom CSS Panel.
If there is no issue in copy and pasting then the possibility is that the existing CSS code has some issues and that is the reason for the error getting displayed so please make sure that the other CSS Code is not causing any conflict.
Let me know how it goes. 🙂
Hi Lis,
I had the same errors.
I did go to the dashboard – Divi – Theme Options – scrolled down to the end – and placed the code in the black rectangle – save changes.
Hi Jan,
This is really strange as on my end it works perfectly fine. Could you please create a small video using loom or anything else and provide me the link so that I can exactly see where things are going wrong for you?
YOU ARE A GOD!!
Thank you, I’ve tried a few Divi tutorials, none have worked but this one worked instantly and super easy to configure to meet specific requirements!
Thanks a bunch!
Thank you, I’m so glad you are enjoying our tutorials!
How do you change the text type (need to know what to insert, I am a rookie) for the button and how do you give the color of the button some opacity of around 50%?
Hey Job, when you hover over the button while editing then you will spot few icons and from them click on the settings icon. After that you will see the content tab where you can update the text of the button. To provide color to the button you need to go to the design tab within the button module settings and enable use custom styles for button and after that click plus sign on the background color settings and slide down the right most bar to decrease the opacity.
Great work! I appreciate all your time in sharing all your tips and tricks. You are a Master!!!
Thank you James, it is a pleasure!
Very well detailed on your video and wording on this page. I appreciate you sharing this knowledge. Very helpful.
I was hoping to know if you by any chance have a video on how to place two buttons on the same image? One button to the left of the image and the second button to the right of the image. If you don’t have a video, maybe a quick tip to know how to do it.
I tried adding another button at the same area and changing the class name by just adding the word “right” to it.
Hi Alexander,
In this guide, you saw how we can place Text Module over an image. Now in the text module you can place the anchor tags inside the div like this:
Now at the place of #, you can place the link you want people to get directed to on click. You can grab the classes given to the elements and style it using CSS and you will have two buttons on the image.
I truly love this little gem – like I love all those other gems – that’s why I bought the lifetime all-access! Great work Nelson and Tasha! Keep it up!
The only thing is that I have trouble getting it to work flawlessly on all screen sizes. You can see the result here: https://www.copernicus-dronten.nl/ and on smaller desktops the text slides over each other to become unreadable. On mobile it looked so crooked I replaced it entirely with a fixed image, but I’d like for it to work on desktops. Any tips?
Thanks
Igor Pont
Hey Igor,
You took a right step in changing the whole element with an image for the screens below 980px. For the desktop, the issue is happening because the top value that both the before and after pseudo-elements have are in percentages so it will adjust as the screen size changes but since the font-size is fixed that is in px so it is not adjusting accordingly and which is leading to an overlapping issue.
To fix this set the top value in :after code to around 295px and set the top value in :before to 200px and the problem will be solved. You can change the values as well as per your liking.
Let me know how it goes. 🙂
This is a great tutorial, very simple to follow, thank you.
For some reason my text modual is not showing up above the image but seems to be getting placed by the image module, do you have any idea how I can fix this?
The error is located on the home page of our site, the Character images at the bottom are the ones with the CSS code added.
http://www.quirkyresource.com/
Hey Tyrel,
I have checked the website and I am not able to find any issue under the character heading that you have mentioned. Could you please check the website in incognito mode or in a different browser and see if that helps?
Let me know how it goes.
Thanks for looking, It turned out when applying the CSS code that the text appeared quite far up the page. I thought it disappeared all together. When I adjusted some of the margin percentage it came back to center image. Thank you for the help.
Hey Tyrel,
I am glad that the issue is resolved now. Let me know if you need any further assistance.
hi I think i’ve followed all the steps but my text is where it was before… i have ‘pa-text-over-image’ in the 2 column css classes in row settings then I have the copied blurb for text over image pasted in the child theme in css class… did i miss something?
i feel like i’m spending forever and getting nowhere! thanks, Amaia
scrap that – just went out and back in and it has the text on the images! thanks!
Hey Amaia,
Could you please share the URL of the page in order for me to investigate the issue?
Very interesting tutorial.
Do you think it’s possible to do this for the portfolio module (replace the icon by a button) “see the project”?
Thank you for your tutorials, always of great quality!
Aurélien.
I think you meant to comment on our other post, as that would be more like what you are asking: https://wordpress-292293-1617718.cloudwaysapps.com/how-to-replace-the-divi-image-hover-overlay-icon-with-text/ For that yes you could just change the CSS selector to the one for the portfolio and it should work great.
Is there a way to also add a .svg? I’ve already uploaded them, but can’t figure out how to include them. I want to put them on top of the text.
Sorry I’m afraid that’s beyond the scope of this tutorial, but you should be able to adapt it using an image module instead of a button module.
I really appreciate your tips here, thanks so much for helping all us Divi users!
You’re welcome Trudy, glad they are helpful!
please could you help me I’m trying to add the “add to cart button” on all the products on the website and make work only by hovering over the product image or box
this is my website: https://170-187-188-56.ip.linodeusercontent.com/24-2/
*I’m noob and trying to learn the website is a test facility for me:D
Hey there,
I have checked the website and I guess this query is already fixed.
Hi Nelson,
Thank you for the tutorial.
You use 2 layers in the tutorial, one image and one text layer.
I want to use 3 (or more) layers.
I want to put two pictures and a text above one picture.
It’s is possible with this tutorial?
I suppose you could try it, I am not sure as I have not tested it.
Hi. This was a great tutorial! Just want I needed to add a button over a gallery for a client’s site. I am using it just for mobile and have a 2nd button I need to add. Is that possible? I was thinking I need to duplicate the button in a different row so it can have a different ID, but then it can’t be over the same gallery. Any suggestions? My test page (please view mobile to see it) is: http://box5397.temp.domains/~lookpho2/?page_id=242303
Hi,
Appreciate the tutorial! However, I have not been able to get the CSS to work on my site (in development)… I believe I followed the instructions and entered the CSS code in Divi/Theme Options/Custom CSS correctly. The button “Graphic Templates Shop Now” still remains below the image. Any suggestions?
I checked your link and everything looks good, maybe it was cache.
Hi,
I was able to get the CSS to work on my site, but had a question about the button design. The button text is fine, but I added the shopping cart icon after the text. The cart icon looks fine in the Divi editor, but does not display in the page preview. Any suggestions?
You can check if the Dynamic Icons setting is disabled in Divi>Theme Options>Performance.
I’m not getting this to work on my site. The text still appears below the image, not overlaid. I have the code installed on the scripts.css page of the child theme, but clearly, I’m missing something.
Hello Allison!
Please make sure you have added the CSS class in the column settings as suggested in the article above.
If still getting the issue, could you please share the URL of the page for me so I can check it?
Hello Nelson and Hemant, thank you very much for this tutorial. I have not been able to get my button centered over the image. It remains in a row under the image. I have added pa-button-over-image to the CSS Class input field, and copied the text from your field above using your copy button—and then placed it in Theme Options > Custom CSS Panel.
The only thing I can think of is I am not creating the button in the right place. I am an inexperienced Divi user. I have a full-width image in one row with a button in a row beneath. Is that the correct way to do this? Thanks for your help.
Hi Gene!
Could you please share the URL of the website? It will help me to understand the issue better.
I have been working on this specific function for three days and cannot get it to work. I have put the code where instructed to do so and also configured the rows, but the end result is still an image above my button. Do you have any suggestions?
Hi Phoenyx!
Could you please share the URL of the page in order for me to investigate the issue?
Awesome, I am using just the” center text css” over image module and it works perfectly.
/*move and position the Text module over the center of the Image module*/
.pa-text-over-image > .et_pb_text {
position: absolute;
top: 45%;
left: 50%;
transform: translate(-50%, -45%);
z-index: 10;
width: 100%;
transition: opacity 0.3s ease-in-out;
/*opacity: 0; remove comment for hover reveal effect*/
}
But I want to use the standard image module’s Opacity Rollover effect, but the text overlay is half blocking my rollover area.
Everything from the text downward is blocking the image layer rollover effect beneath it.
I am sure there is some easy CSS to add here to have the text layer area not extending beyond the actual text.
How might I do this?
Thanks
Ron
Hi Ron!
Could you please share the URL of the page in order for me to investigate the issue?
In the work section:
https://simondesignoc.com/2023
Please do not post the URL. Just the answer.
Hi Ron,
Unfortunately we are not able to provide custom solutions. You will need to check with a developer about your use case.
Hi Ron!
The Margin-top: -35px added in the Text module is causing the issue. Please remove it to align the text correctly.
Hi – thanks for the great tutorial. I’m using the CTA module as my overlay, and I’m keeping the background color rather than removing it. Is there a way to make it the same size as the image? Right now, when you roll over the image, the text on the color shows up as the overlay. But the size of the colored background seems to be determined by the amount of text and the button rather than covering the full image. Is there something I can add to the css to make the overlay the same size as the image, no matter how much or how little text I use?,
Hi Becky!
I’m not sure if you have used the button from the CTA module or the Button module. Can you please share the URL of the page to investigate further?
Does this solution still work?
I’m working on a draft page (so no URL), and it doesn’t work for me. I’ve placed the code in CSS User, the Page Custom CSS, and the Divi Theme Options CSS. No matter what I do, the button never moves.
I’m using Divi ver 4.22.2 and Divilife Child Theme ver 1.0.0
Hi Steven!
Please try adding !important in each code property and see if it helps. Ex:
.pa-text-button-over-image > .et_pb_promo {
position: absolute !important;
}
Hi, I am a complete Divi novice and just building my first website. Your blog and youtube videos have been a valuable resource and I thank you for them. I am using the CTA module over image and it is looking great on a desktop screen. However I am having difficulty in making it responsive.
I notice in a reply to a comment it talks about replacing the object completely. Could you just explain what you mean by this. Is it to duplicate the whole section and set the visibility to just tablet and mobile and change the image sizes etc and text accordingly? then of course set the original section to only appear on the desktop?
Really appreciate your help. I would love to take out the lifetime membership but I am only building a couple of sites at the moment for local charity so will have to see how I get on.
Hi Simon!
Yes, using the visibility option (hide on desktop and show on mobile) is one approach for the responsive issue. However, we can make it responsive using media queries as well. Can you please share the URL of the page to check further?